www.mywifiext.net Refused to Connect?
If you own a Netgear wireless range extender, then you must be aware of mywifiext.net and mywifiext.local URLs. In case you get an error while connecting to mywifiext.net, then you must know that this is not a regular website. It is the local web GUI address that is used to reach the settings of the Netgear WiFi extenders, where you can manage them. The web page will walk you through the topmost issues that users come across while accessing mywifiext login page. Plus we have also provided the solutions to solve the issues right away, these troubleshooting tips will also help extender to perform well.
Download Genie App From Here
Steps to Access Mywifiext.net Login Page
Before addressing the issues, we want you to learn about the instructions for accessing the URL. Perhaps the process that you are using is not proper which is why you are getting an error message and can’t access the desired web page.
Whether you want to set up your Netgear extender or want to make changes to its settings, you need to go to the admin dashboard. This can be done using mywifiext.net for Windows PC and mywifiext.local for MAC devices. Here is how you can do this:
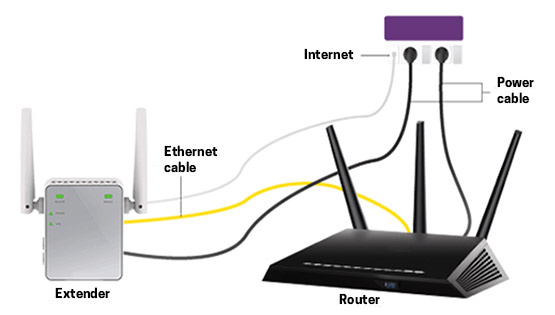
- Ensure a firm connection between the Netgear wireless range extender and the host router.
- Use an Ethernet cable to establish the connection between the two devices.
- Also, make sure that both devices are powered up and are receiving a consistent power supply.
- Have your computer or laptop connected to the extender’s WiFi? You need to connect to Netgear_ext SSID.
- Open an internet browser next.
- In the address field, type mywifiext.net or mywifiext.local.
- Press the Enter key.
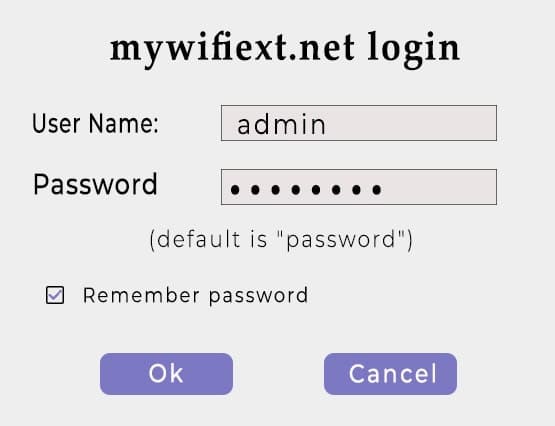
- You are now accessing the mywifiext.net login window.
- Key in the admin username and password and click Log In.
You have logged in. You can go ahead and make changes to the settings of your extender in a hassle-free way.
Mywifiext.net Not Working Even Now?
Did you follow the same steps and still could not access the login page? Try the troubleshooting hacks given below:
- Check the connection between the extender and router.
- Verify all the cables and wires. Everything must be intact.
- Bring the extender closer to the router in case they are connected wirelessly.
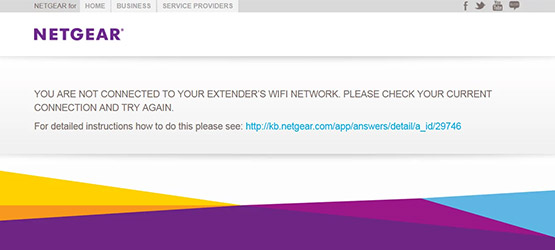
- Ensure that your computer or laptop is connected to the extender’s network. This is an essential step. If your computer is not connected, you might receive an error message like this:
- Use a supported and updated web browser.
- Delete cache and cookies from the browser.
- Check the power supply to the extender as well as the router.
- Temporarily disable Antivirus and VPN server if enabled.
- Make no typing mistakes while inserting the web address.
Troubleshooting Steps to Fix mywifiext.net Not Connecting
Are you still stuck even after taking into consideration the points given above? Here are a few troubleshooting steps that you need to try now:
Reboot the Devices
Disconnect the Netgear extender from the host router and power the devices off. Wait for about 5 minutes. This will help in getting rid of technical glitches and also the devices get a recovery time. Now, connect the router and extender if you are using an Ethernet cable. Turn on the router first and then power on the extender.
Use IP Address
You can also use the default IP address instead of mywifiext.local. If the web address does not work for you, then use the IP address. The default IP address for Netgear wireless range extenders is 192.168.1.250.
Note: There is a possibility that the default IP address may not work. This is because the router assigns a different IP address to the connecting devices to avoid IP conflict. In such an event, you should check in the router’s settings what IP has been assigned to the extender. Use that one to log in.
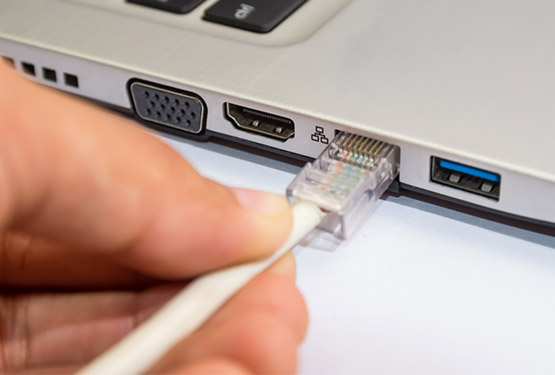
Make Ethernet Connection
If www.mywifiext.net refused to connect even now, then connect the Netgear extender to the computer using an Ethernet cable. This is definitely going to help you out.
Reset Netgear Extender
If none of the above hacks worked, then there are chances that the Netgear extender is not set up properly. Or maybe there is an issue with the extender’s configuration. This usually happens after a power outage or firmware update. Resetting the extender is the final resort in such cases. Use the instructions given below to reset your devices:
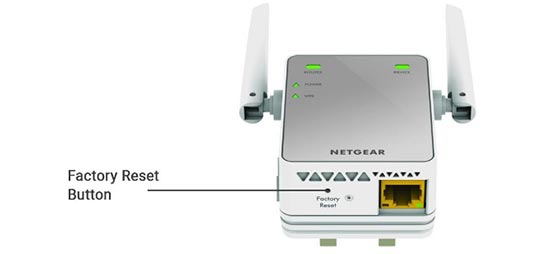
- Turn on the extender.
- Disconnect it from the router.
- Press the Reset/Factory Reset hole using a paper clip for at least 10 seconds.
That’s it! The device has restored the factory settings now.
After resetting the extender, you need to set it up once again. For ease, we have also provided setup steps ahead:
How to Use mywifiext.net for Setup
- Connect the Netgear extender to the router using an Ethernet cable.
- Turn on the devices next.
- Launch a browser on the computer connected to the extender’s WiFi via Netgear_ext.
- Type mywifiext.net/mywifiext.local.
- Hit Enter.
- You will reach mywifiext setup screen.
- Accept terms and conditions.
- Enter the default admin password.
- Select SSID and password for both wireless bands.
- Select the network that you want to extend.
- Follow a few more on-screen prompts and you are done.
We are very sure that you will no more be facing the Netgear extender login issues now. Now that you have set up your device, you can modify various settings of your devices like:
- Update extender firmware
- Change admin password
- Check connected devices
- See network status
- Backup and restore settings
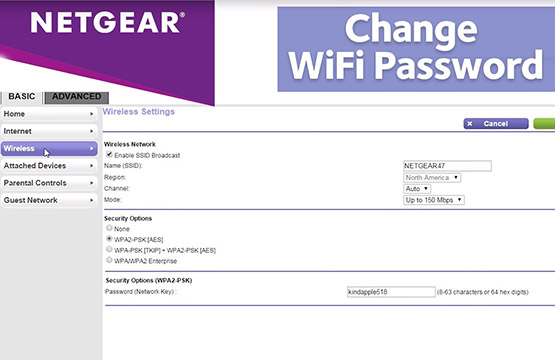
- Modify WiFi settings and much more
We recommend you change the admin password now if you haven’t done it during the setup process.
How to Change Netgear Extender Admin Password?
- Log in to mywifiext page on a computer that is connected to the extender’s WiFi.
- Click on the Menu icon.
- Select Settings > Password.
- Type an email address that is in use in the User Name field.
- Type the new admin password in the New Password field.
- Again type the same password to confirm it.
- Select the security questions and fill in the answers.
- Finally, click Save to save the changes done by you.
Now, you can use the new admin password to access the mywifiext Netgear login page.
After the setup is done, you should also look for any updates for your extender. Firmware updates will help in enhancing the overall performance of your device. Here is how you can update your Netgear extender:
Steps to Update Netgear Extender

- Grab a computer and connect it to your extender’s WiFi.
- Launch a browser and access Netgear dashboard via mywifiext URL.
- Once logged in using the admin credentials, click on Menu.
- Select Settings > Firmware Update.
- Now, click on Check Online.
- If a new update is available, you will be notified about it.
- All you need to do next is follow the prompts that you see on the screen.
Tips for Netgear Extender Placement After Setup
The whole purpose of investing in a wireless range extender is to extend the existing network coverage. To serve this purpose, you need to choose an ideal location to place your extender. Use the tips given next to know how to select an appropriate location for your extender:
- Ensure placing the extender in close proximity with the host router. You may not choose to connect them using a cable. In such cases, the extender must sit within the router’s network range.
- Some other devices or home appliances can interfere with the WIFI signals thereby reducing the quality of the network that you receive. So keep your extender away from networking devices and home appliances.
- Choose an open and higher place so that all the connecting devices can have easy access to the network.
- Try to maintain a proper line of sight between the extender and connecting devices.
- Position the antennas wisely such that they are pointing toward connected devices.
As the Netgear extender setup is done using mywifiext web page, you can customize its settings as per your requirements. You can now connect various networking devices to the extender’s network and enjoy seamless internet.