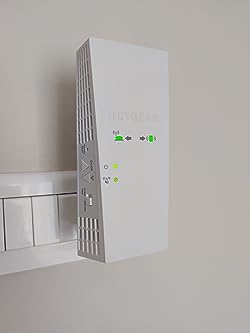
Netgear EX6250 Setup
Find on this page the detailed information on Netgear EX6250 setup using three different ways. The same page will also walk you through firmware updates and other configuration settings on the Netgear WiFi range extender.
A WiFi range extender is connected to the existing WiFi router to expand the network coverage area. The extender is made to sit at the boundary line of the router so that its range can be expanded further. The extender router connection process is given ahead.

How to Set Up Netgear EX6250 Extender?
Before you start the Netgear WiFi extender setup process, know that if you are setting up the extender which is already in use then reset it first. Reset and delete the customized settings and make it ready to set up again. The extender must have the default settings during the setup process.
Netgear EX6250 Reset:
- Look at the side panel of the extender to locate the Reset button. It resides inside a pinhole.
- Press the Reset button on the extender using an object that’s sharp and pointed.
- Release the button and wait till the extender reboots.
- Your extender is now ready to be reconfigured as it has all the default settings restored on it.
Netgear EX6250 can be installed in Access Point and Extender modes. On the side panel of the extender, you’ll find the button that is to be used to set the desired mode. If you are setting it up in Extender mode, then set the switch to Extender, otherwise set it to Access Point. This is to be done first. After that, you can use any of the methods given ahead for Netgear EX6250 setup.
WPS Setup
- Bring the extender to the same room as the WiFi router.
- Consider plugging in and applying power to the extender next.
- Let it completely power on.
- Press the WPS button on the extender now. The WPS LED blinks. Avoid pressing the button for more than 5 seconds as this will turn the extender off.
- Within 2 minutes, press the WPS button on your router.
- Wait and let the devices connect. The Router Link LED turns on when the connection is made.
- If the LED is red or amber move the extender near the router and try the WPS connection again. The light should be solid green.
- Repeat steps 4 and 5 if your router also supports the 5 GHz network band.
Web Interface Based Setup
- Place the extender and router next to each other during setup.
- Supply power to the devices.
- Connect your computer to the extender’s network by either using default WiFi credentials or make a LAN connection. Check the WiFi details on its label or user manual.
- Access the Netgear extender setup page by visiting mywifiext.net on a browser. The default IP 192.168.1.250 can also be used.
- Follow the on-screen prompts to complete the Netgear EX6250 setup.
- You can refer to this page for complete instructions for the setup process.
Nighthawk App Setup
- Download and install the Netgear Nighthawk app on your smartphone.
- Meanwhile apply power to the Netgear extender EX6250.
- Connect the phone to the extender’s default network name Netgear_EXT.
- Run the Nighthawk app and execute the instructions on the app.
The detailed instructions can be checked here.
How to Update Firmware on Netgear EX6250?
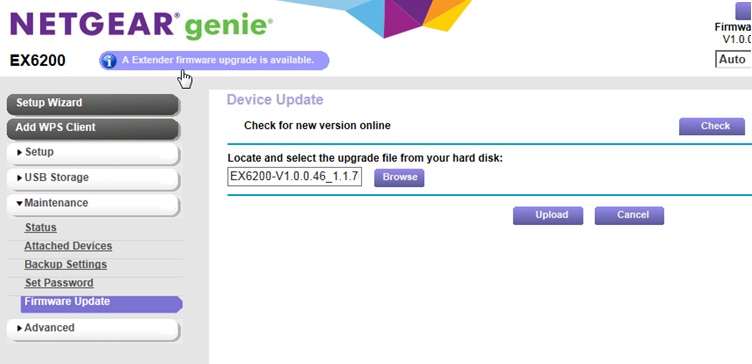
It is important that you keep your Netgear extender’s firmware always up-to-date. You can check for available firmware updates by logging in to the extender. Go to the Firmware Update section and click Check Updates. If an update is available, you will get information about the same. It will also ask you to confirm if you want to install the updates on your extender. You can simply follow the instructions to get the job done.
There’s one more option which is mostly recommended. You can opt for a manual firmware update. In that event, you first download the firmware file on your computer and then log in and install the updates. The steps are as follows:
- Go to Netgear Download Center and download the firmware file for EX6250. This is to bring to your notice that firmware updates vary for different models. Thus, be vigilant while downloading the file. Save it on your PC.
- Now, log in to your extender. You need to use mywifext.net or mywifiext.local to go to the login page.
- Use the admin password to go to the dashboard.
- Go to Menu > Firmware Update.
- Click on Browse and select the firmware file you saved on the PC.
- Now, click Upload to start the installation process.
Let the extender update and do not interrupt the process in between. The Netgear EX6250 extender will reboot itself when the updates are successfully installed.

