Netgear Nighthawk EX8000 Setup
Netgear has launched a new WiFi device which is Netgear EX8000 extender. here, you will gather details about how to complete the Netgear Nighthawk EX8000 setup with help of simple steps and tips.
We will cover the physical linking, configuration (login process) using mywifiext.net, firmware update, change WiFi password and how to dispel technical issues.
Nighthawk EX8000 Setup
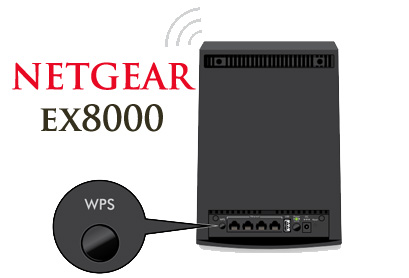
To start the Netgear Nighthawk EX8000 setup, you have to connect it to the router network. there are two ways to built the connection; first is via WPS and other is via Ethernet cable.
Via WPS
- Turn the extender on by plugging its power cord to the wall socket, then wait until the extender power LED to light amber and then turn green.
- Press the WPS button on the router and extender, both the devices connect to each other automatically.
Via Ethernet
- To connect the router to the Nighthawk extender via cable, you just have to place it close to the router.
- Insert the cable ends to the router LAN port and extender WAN port, after that turn the router and extender on.
The Netgear Nighthawk EX8000 setup is not completed yet, you have to configure the extender to the make the connection complete.
Nighthawk EX8000 Login Process
You have to start with connecting the computer to Netgear Nighthawk EX8000 via LAN cable, then just follow down written steps.
- Go to an updated web browser in your computer.
- Enter the login URL mywifiext.net or IP address 192.168.1.250.
- The browser will take you to the extender interface login pag.
- Username and password to access the interface are given in the user manual.
- Enter the admin credentials and reach to the EX8000 interface window.
- Here, you can adjust the settings like updates, frequency bands settings, passwords, and username etc.
You must also get to learn how to update the EX8000 extender firmware from your computer and how to change the passwords.
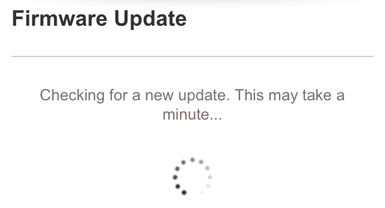
How to Update EX8000 Firmware?
Get the access to the mywifiext.local interface and type admin credentials like username and password. You have to click on the settings option and find the Firmware tab, open it. To start the update, just tap the download the latest version of firmware and click on Install button. After upgrading the device, you have to reboot EX8000 system so that all updates will install.
How to Change EX8000 WiFi and Admin Password?
- There are some security reasons that can affect your WiFi signals. For that you should change Netgear Nighthawk extender WiFi password and admin password.
- Go to the interface, open the Wireless Settings and edit the network password by clicking on it. Enter your desired password in the field and save it.
- To change the admin credentials, open the settings and go to admin tab. In here, you can easily edit the admin password, just type the password and save it.
Dispel Issue by Rebooting and Resetting EX8000 Device
There are problems that you can face while Netgear Nighthawk EX8000 setup like internet not working or router not connecting to extender. You can easily solve it by following these down written tips.
Reboot Process
You can restart the device by pressing the power button twice on the extender device or unplug the power cord from the wall socket and plug it again.
Reset Process
To run a factory reset procedure on your Netgear Nighthawk EX8000 device, you have to long press the RESET pinhole button.
But after reset, you have to log into the interface again and start the new extender setup again.
Here, you have seen and learned how to complete the Netgear Nighthawk EX8000 setup easily using tips and instructions.