After you have completed the installation of your Netgear EAX20 wireless range extender, you can connect to its network. Use the WiFi name that you created or the default SSID Netgear_Ext (If not updated) and insert the WiFi password to connect. However, before you begin accessing the extended network, you should make certain changes to your WiFi extender. This post will walk you through the changes that we are talking about. Read on.
Netgear EAX20 Extender Setup Completed: What Next?
1. Relocate the WiFi Extender
During the initial installation, it is recommended to place the extender close to the WiFi router. However, after you have configured the extender, it can be shifted to another location so that it can be used to get internet access in the area that is outside the router’s range. Before you shift the extender, consider the following factors:
- The extender should be placed in an area that is halfway between the router and the area with no WiFi signals.
- It must be ensured that the extender is placed in the network range of the router.
- You should avoid keeping it close to other electronic devices and home appliances.
- Reflexive surfaces like mirrors shouldn’t be close to the extender.
- Large water bodies like fish tanks can absorb the signals. Avoid keeping the extender near it.
- Choose a higher and open location with minimum congestion.
1. Change Admin Password
Although you’re prompted to update the admin password during setup, if you haven’t changed it, update it now. Here are the steps:
- Log in to the Netgear EAX20 WiFi extender on a browser via mywifiext.net.
- Go to Settings.
- Select Password. This opens the Password Settings page.
- Type a new password in the New Password field.
- Choose security questions and provide answers to them. These answers will help you retrieve the admin password if you forget it later.
- If you want to update the username, you can add a new username.
- Save the settings.
2. Upgrade EAX20 Firmware
Updating the WiFi extender is of utmost importance. You should always keep the firmware version to the most recent version. Check for firmware updates for your extender by logging in and get it updated. Use these steps:
- Access the extender login page on a browser using URL or IP 192.168.1.250.
- Insert the login password that you created and log in to the extender’s dashboard.
- Click on the Menu icon.
- Select Firmware Update to open the firmware update page.
- Click on the button Check Online.
- If there’s an update ready, you can follow the prompts on the screen to update your extender.
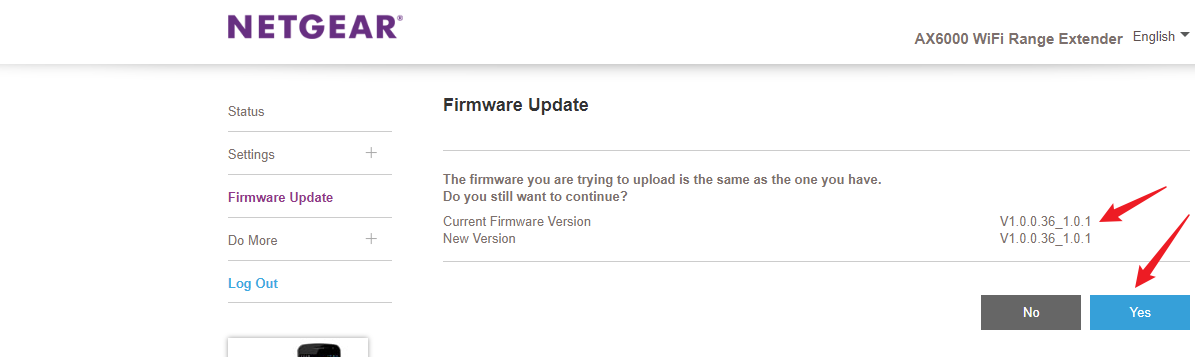
Make sure while you’re getting the firmware installed on your Netgear EAX20 extender, you shouldn’t interrupt the process. Else the firmware may corrupt. If that happens you need to reset your extender using the steps given below.
How to Reset EAX20?
- Plug in and power on the Netgear extender.
- Use a pointed object that can reach the Reset button inside the hole on the extender.
- Press and hold the button using the object.
- Hold it for about 10 seconds.
- When you release the button. it will take some time for the extender to reset its settings to the default values.
When the extender boots up after the reset process, you should set up the Netgear extender once again. The steps for WPS setup are given below.
Netgear EAX20 Setup: WPS Method
- Place the WiFi extender and router closer.
- Plug them and supply electricity.
- Press the WPS button on the extender.
- Within the time frame of 2 minutes, press the WPS button on the router.
- Wait for some time and repeat the process to configure the second network band also.
Your Netgear EAX20 extender is now set up. Refer to the user manual to learn about the manual method of Netgear WiFi extender setup.
Closing Thoughts
After you have configured the Netgear EAX20 WiFi extender, you should perform the steps that we have discussed in this post. You can then begin connecting your client devices to its network and enjoy an impeccable extended network.