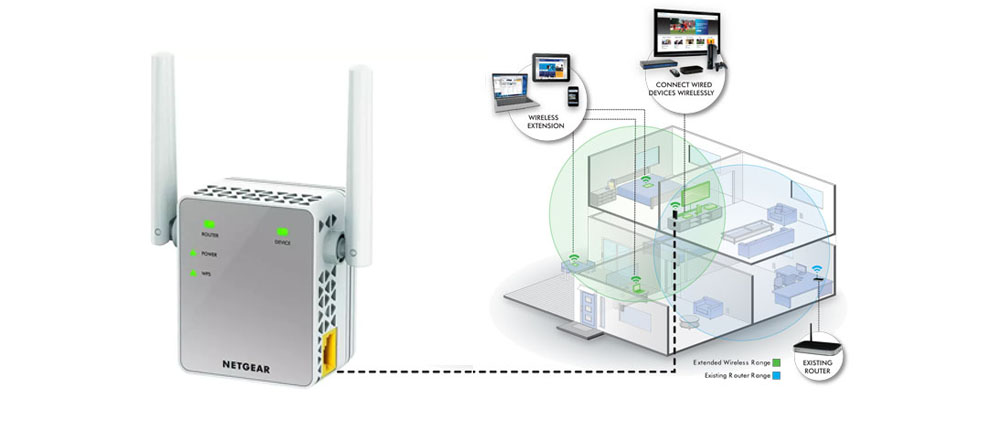
Living in a large home or apartment? If so, chances are that you are facing WiFi connectivity issues. The only solution to this issue is extend the existing wireless network range. And you can do so with Netgear extender setup.
Netgear WiFi range extenders allow you to maintain a strong and reliable wireless signal throughout the home. So, to start learning some basic and simple guidelines to get the job done, read this post.
Set your main WiFi router as a Base Station
Make sure that your main router is connected to your computer or laptop physically and properly via Ethernet cable. This step will allow you to log in directly to the WiFi router.
Login to your main WiFi router. For this, open a relevant web browser and type the default IP address. If you enable a network password, then enter your login credentials now. If you haven’t, then chat with our experts and ask our certified technicians for the same.
Find the basic wireless settings
From here, make sure that your main WiFi router is broadcasting the strongest signals possible.
Moreover, if you haven’t changed the name of your main SSID (network name), do that now. Make a note of it and keep it aside. This will help in the new extender setup process and also while accessing mywifiext.net login page.
Select either Repeating Functions or Signal Repeat Settings
Here, you get an option to enable the wireless repeating function on your home networking system.
After that, at this point, you will establish your primary router as your base station. On the other hand, make sure that you have selected the base station functions for this router and not for the Netgear extender settings.
Enter the MAC (Media Access Control) address of your main router or range extender
The MAC address for your wireless range extender is printed on a sticker located on the back panel of the unit. The MAC address will be about twelve characters. They will be either eight groups of two characters separated by hyphens or colons or four groups of four separated by periods, for example, 01-23-45-67-89-ab or 0123.4567.89ab or 01:23:45:67:89:ab.
Unplug the Ethernet cable from the main base station and connect it to your smart wireless repeater (extender) or secondary router that will be acting as a range extender.
The next step for Netgear extender setup is login to your main router again using a different web browser and typing mywifiext into the address bar field.
Go to basic settings and also ensure that your signal booster (extender) is communicating with the specific wireless network by typing in the correct SSID (correct) you are using for your base station.
In the repeating settings menu enable the signal repeating functions
For your WiFi booster (extender) you should assign a specific IP (Internet Protocol) address i.e. 192.168.1.250. here, we would like to recommend our valuable users to Write down this IP address because you will need it to access mywifiext.net setup and Netgear Genie page to change settings of your range expander (extender) in the future.
Enter the MAC address of your Base Station
The MAC address for your base station is located on the back panel of the unit on a sticker that will have a similar look to the MAC address for the Netgear wireless repeater.
Carefully save these settings and disconnect your range extender from your computer or laptop you are using.
At last, find a suitable location for your range extender to place. It should be within the reach of your existing wireless router but away from interference-creating obstructions like microwave, refrigerator, baby monitors, treadmill, automatic door alarms, doors, walls, windows, electronic devices, metal appliances, Bluetooth speakers/ devices, etc. This way you will get a maximum and uninterrupted signal extension.
If you are experiencing any issues related to this post then you are free to ask us for mywifiext.net support and Netgear extender support. Simply lay your issues on us via chat or email.